настройка jdk в windows 10
Установка JDK в Windows
В этой статье мы установим JDK 11 на Windows. Java Development Kit (JDK) – это набор программ и библиотек для разработки программ на Java. Если вы хотите разрабатывать на Java программы, сперва вам нужно установить актуальную версию JDK.
В данной статье мы покажем, как установить JDK 11. Эта версия LTS (long time support), которая будет поддерживаться до сентября 2022 года. Вы можете установить любую другую версию JDK на ваш вкус, используя эту инструкцию.
Как установить JDK
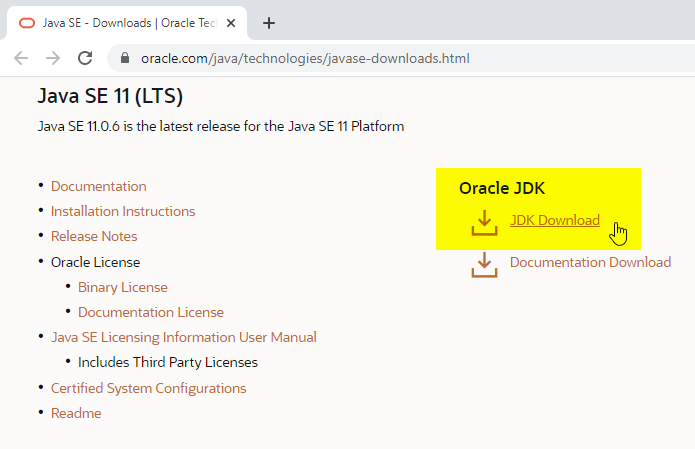
Скачайте нужный дистрибутив JDK
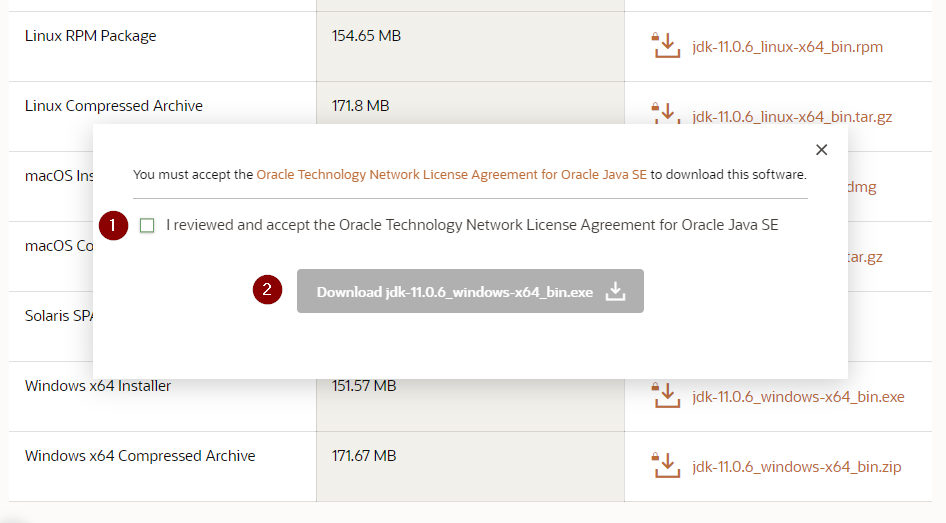
На следующей страницу выберите дистрибутив «Windows x64 Installer»:
Появится всплывающее окно. Согласитесь с условиями лицензии и нажмите кнопку Download:
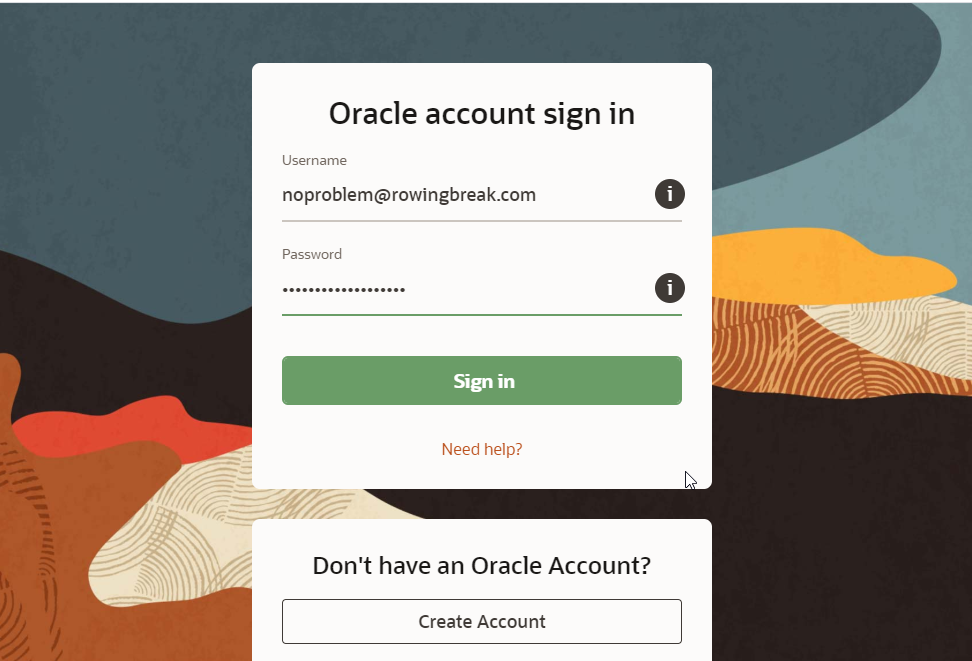
Для скачивания вам потребуется залогиниться в существующую учётную запись Oracle. Если у вас её нет, вы можете создать новую учётную запись.
Если вам лень заморачиваться с созданием учётных записей, найдите работающий логин/пароль на сайте bugmenot
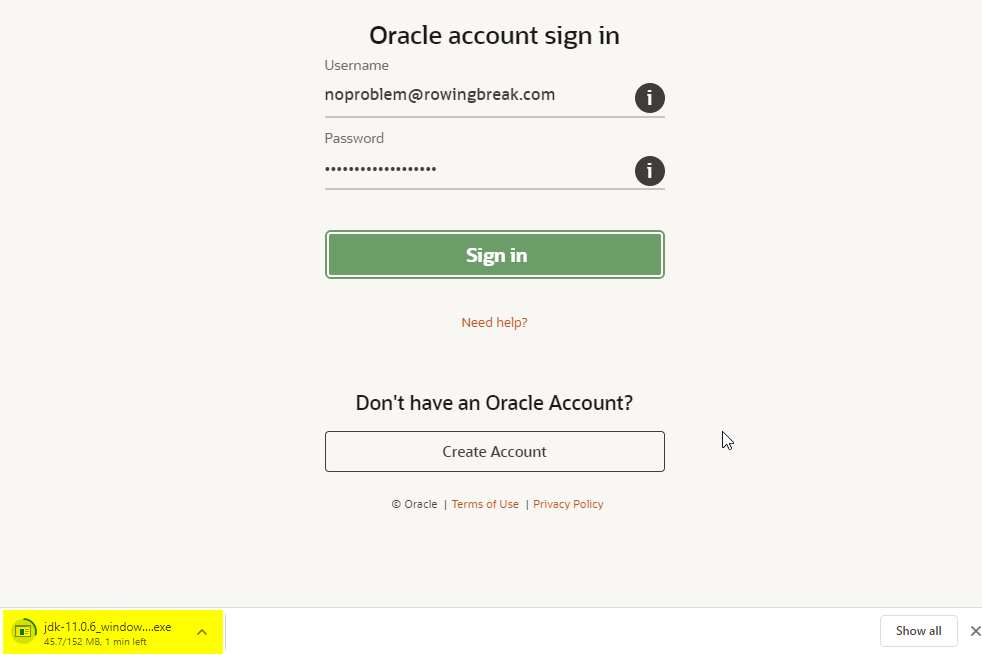
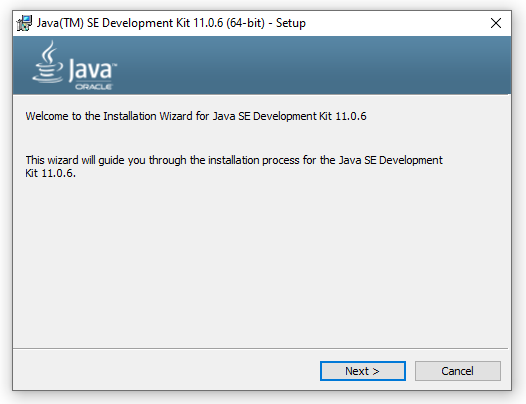
Начнётся скачивание инсталлятора. По окончанию загрузки запустите установку:
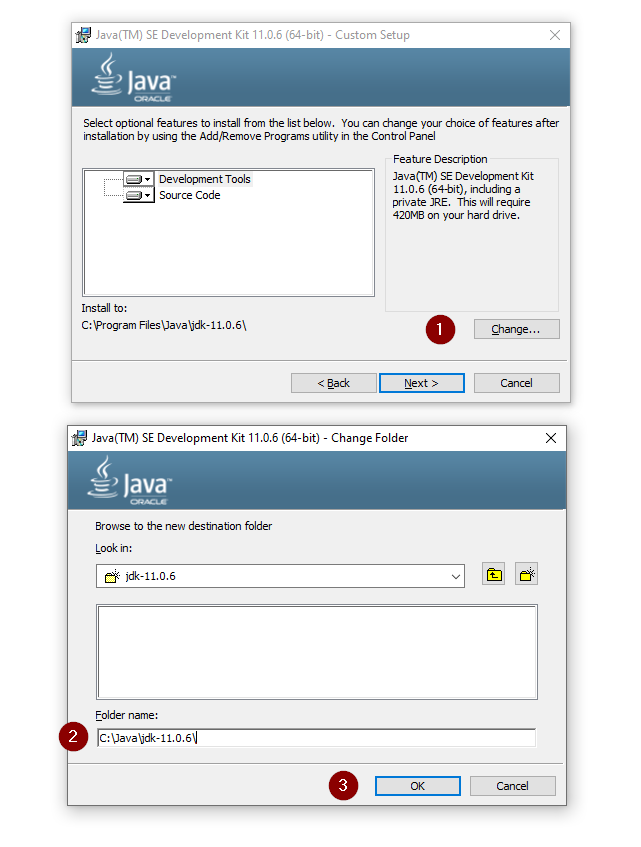
На этапе выбора компонентов укажите путь установки. Я крайне рекомендую вам заменить стандартный путь C:\Program Files путём, не содержащих пробелов, например, C:\Java\jdk-11
Через несколько минут установка завершится:
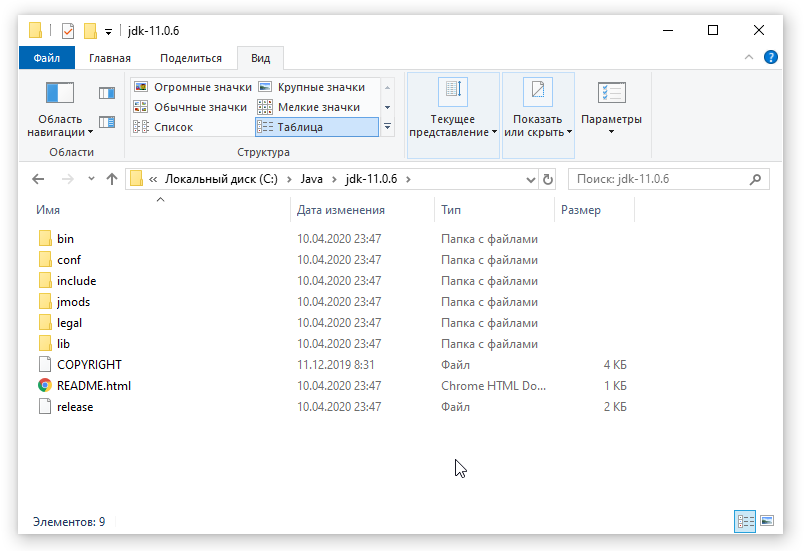
Для проверки вы можете зайти в указанный вами путь и проверить, что там есть следующий контент:
Настройка переменных окружения
После успешной установки JDK, крайне желательно объявить переменную окружения JAVA_HOME. Эта переменная используется многими программами и инструментами из стандартного набора Java разработчика.
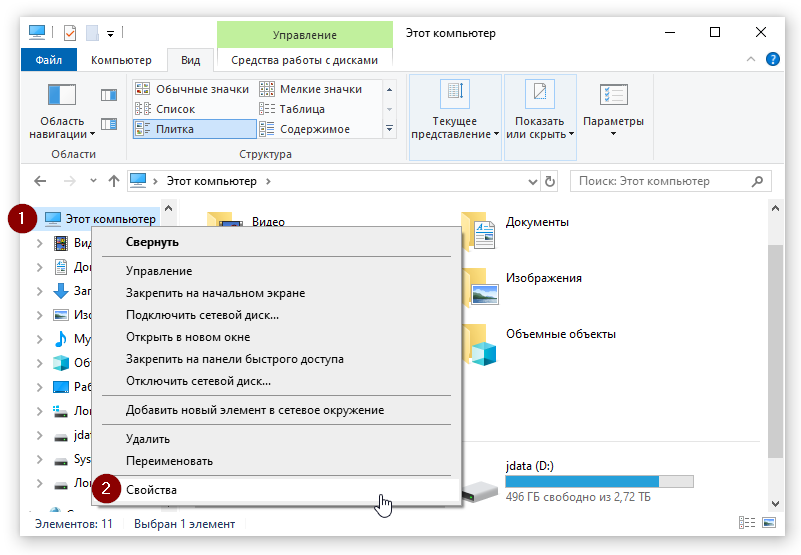
Для этого откройте окно «Этот компьютер» → «Свойства»:
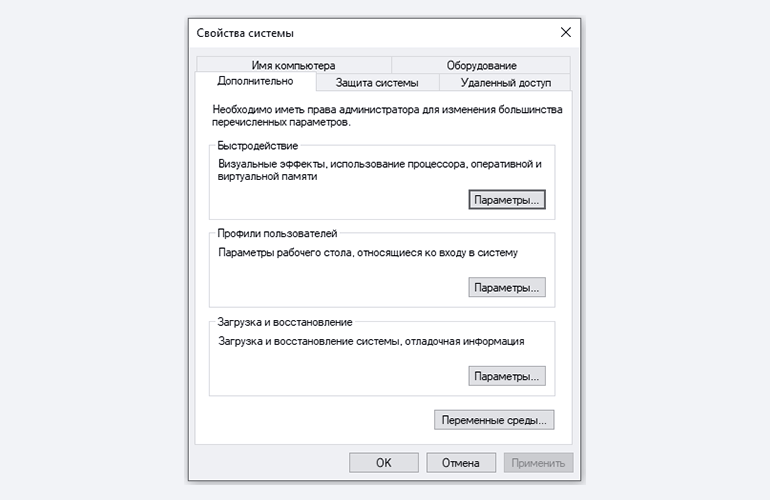
Затем откройте окно «Дополнительные параметры системы» и в нём нажмите кнопку «Переменные среды…»
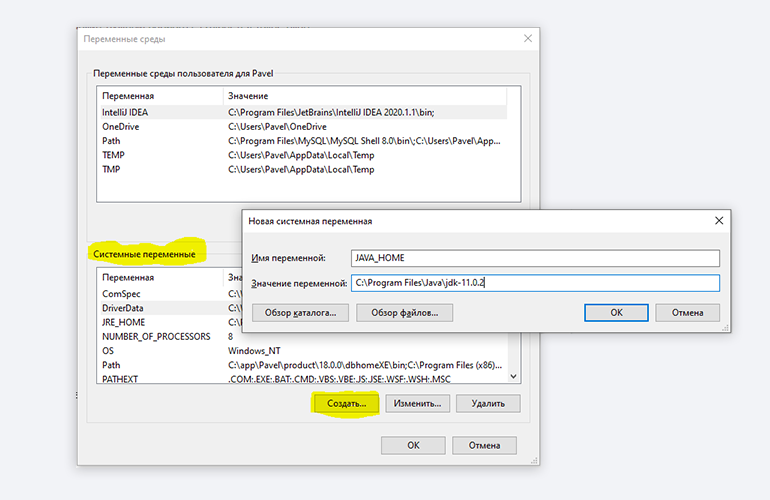
В окне «Переменные среды» нажмите кнопку «Создать…»
В появившемся окне введите следующие значения:
Имя переменной: JAVA_HOME
Значение переменной:
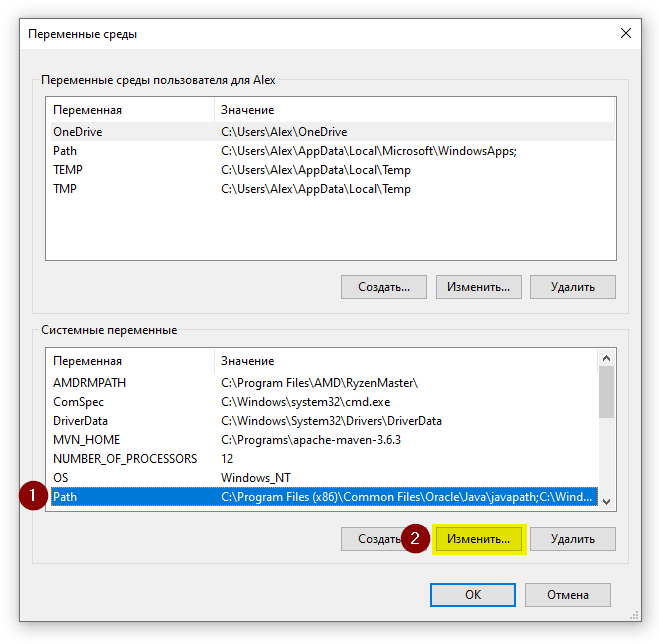
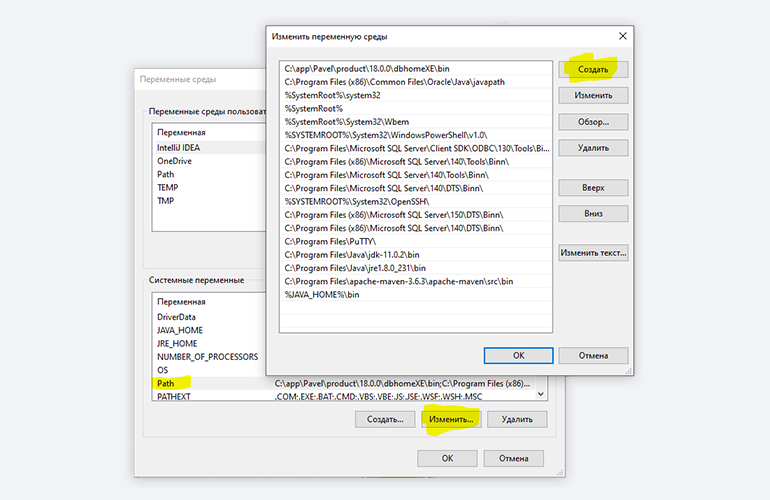
Затем найдите системную переменную Path и измените её:
Нажмите кнопку «Создать», и укажите в новой строке значение %JAVA_HOME%\bin
Также, если вы видите в этом списке путь к программе javapath (как на скриншоте), удалите его.
Проверка установки
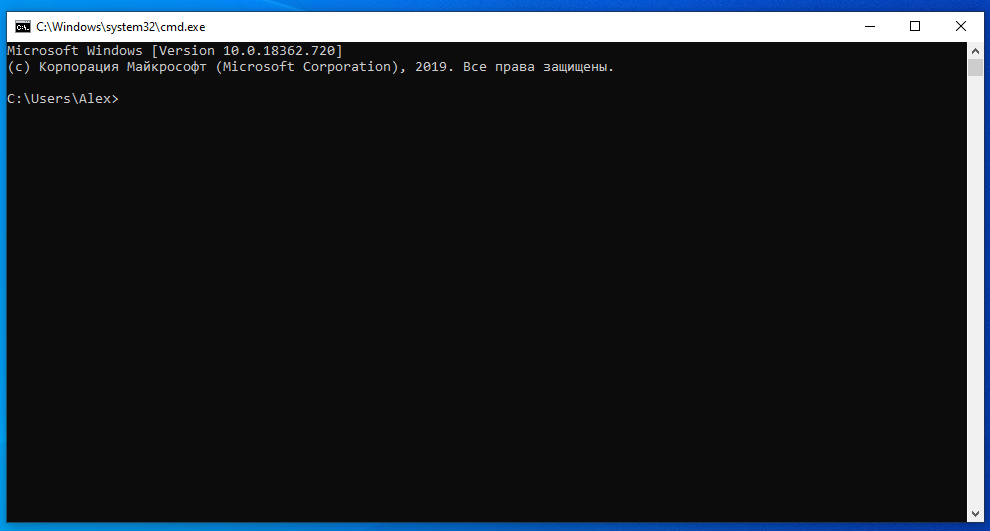
После установки переменных окружения откройте консоль (Win+R, cmd)
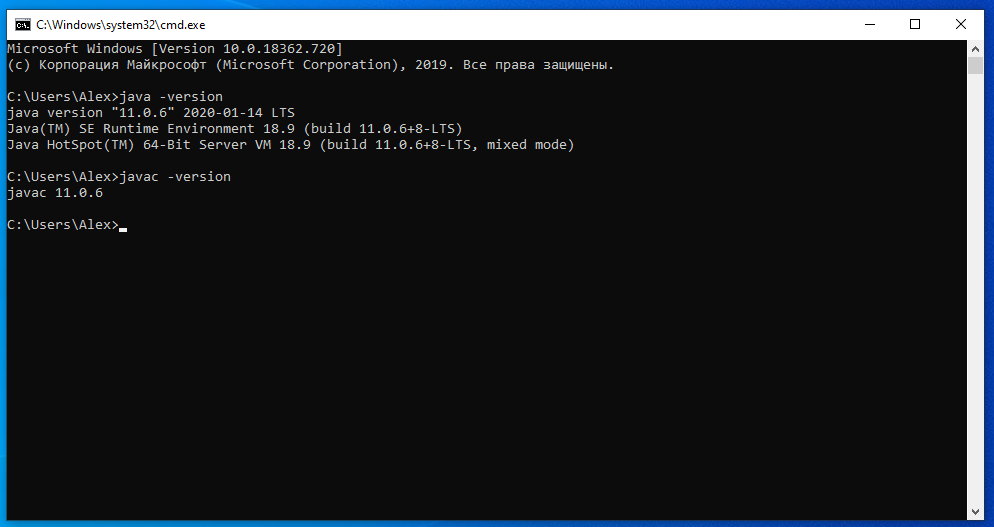
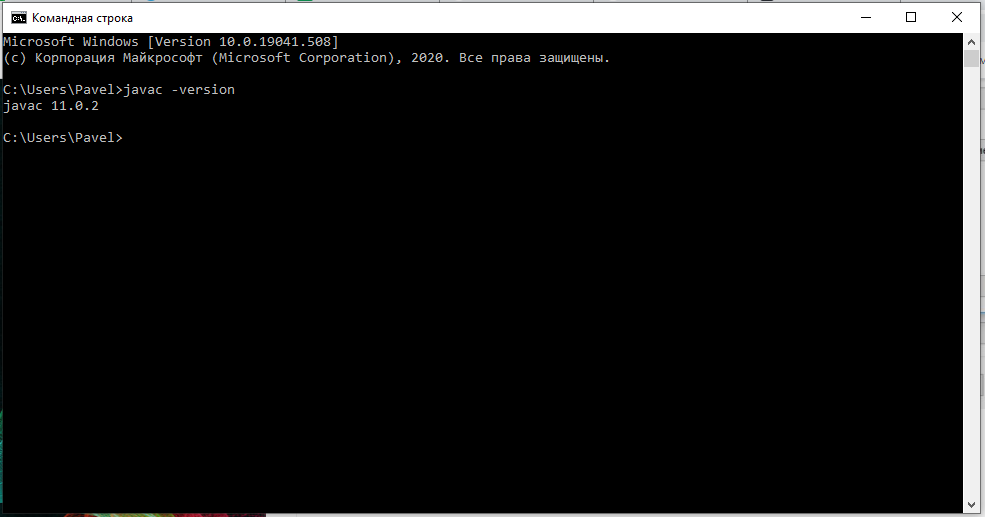
Последовательно выполните две команды:
Если вы видите вывод наподобие этого, значит, вы корректно установили JDK и правильно указали переменные окружения. Вы готовы написать свою программу на Java!
Резюме
В данном уроке мы научились устанавливать JDK и настраивать перменные окружения. В следующих уроках мы установим основные инструменты Java программиста.
Настройка jdk в windows 10
This topic includes the following sections:
System Requirements for Installing the JDK on 64-Bit Windows Platform
JDK Installation Instruction Notation for Windows
For any text in this document that contains the following notation, you must substitute the appropriate update version number:
JDK Installation Instructions for Windows
You run a self-installing executable file to unpack and install the JDK on Windows computers.
Install JDK on Windows computers by performing the actions described in the following topics:
Downloading the JDK Installer
Verify the successful completion of file download by comparing the file size on the download page and your local drive. Alternatively, you can ensure that the downloaded file’s checksum matches the one provided on the Java SE Downloads page.
Running the JDK Installer
During installation, the following files are copied to the location mentioned:
Alternatively, you can run these executables directly from the JDK’s bin directory.
Installing the JDK Silently
Instead of double-clicking or opening the JDK installer, you can perform a silent, non interactive, JDK installation by using command-line arguments.
Beginning to Use the JDK
Use the Java Development Kit in the Windows Start menu to access information related to Reference Documentation.
During JDK install, Java menu items are added to the Windows Start menu to provide easy access to Reference Documentation, which is online documentation web page.
During JDK installation and uninstallation processes, the appropriate start menu items are updated so that they are associated with the latest JDK version on the system
Uninstalling the JDK on Windows
Uninstalling the JDK in Silent Mode
You can use the command line for uninstalling the JDK.
For example, to uninstall JDK 15, run the command:
Windows Installer dialog appears prompting you for confirmation. Click Yes to uninstall JDK.
Finding the JDK Registry Key and UninstallString Value
Under the Uninstall folder, you will find many registry entries within curly brackets.
Highlight Uninstall folder before performing search for a particular registry.
The registry key is highlighted on the right-hand side of the pane and values of various uninstall strings are displayed on the left-hand pane.
JDK Installation Troubleshooting
The topic provide tips for resolving issues while installing JDK.
System Error During Decompression
Program Cannot Be Run in DOS Mode
Open the MS-DOS shell or command prompt window.
Right-click the title bar.
Select the Program tab.
Ensure that the item Prevent MS-DOS-based programs from detecting Windows is not selected.
Exit the MS-DOS shell.
Restart your computer.
Characters That Are Not Part of the System Code Page
The associated bug number is 4895647.
Cleanup the Registry After a Failed JDK Uninstall
Sometimes, attempts to uninstall JDK through the Windows Add/Remove program leave behind some Java entries in the registry that are not fully removed. These left behind registry entries can cause problems in installing a new version of Java. The following are the methods to cleanup registry entries:
Program Install and Uninstall troubleshooter (Recommended Method)
Run the Program Install and Uninstall troubleshooter to repair the corrupted registry keys that prevent programs from being completely uninstalled, or blocks new installations and updates.
Manually edit the registry (Use this only if the Fix It utility does not work)
Incorrectly editing your registry may severely damage your system. You should back up any valued data from your computer before making changes to the registry.
Use the File->Export functionality of the registry editor to save the registry key before deleting. In case you deleted the wrong registry key, you can restore the registry from your saved backup file, by using the File->Import functionality.
To delete the registry key:
Click Yes when prompted.
The JDK gets uninstalled.
Fixing Shim Situation when JDK 17 and JRE 8 is Installed
This is a bug with the JRE 8 installer. To fix this shim situation, uninstall and reinstall JDK 17.
Настройка jdk в windows 10
This topic includes the following sections:
System Requirements for Installing the JDK on 64-Bit Windows Platform
JDK Installation Instruction Notation for Windows
For any text in this document that contains the following notation, you must substitute the appropriate update version number:
JDK Installation Instructions for Windows
You run a self-installing executable file to unpack and install the JDK on Windows computers.
Install JDK on Windows computers by performing the actions described in the following topics:
Downloading the JDK Installer
Verify the successful completion of file download by comparing the file size on the download page and your local drive. Alternatively, you can ensure that the downloaded file’s checksum matches the one provided on the Java SE Downloads page.
Running the JDK Installer
During installation, the following files are copied to the location mentioned:
Alternatively, you can run these executables directly from the JDK’s bin directory.
Installing the JDK Silently
Instead of double-clicking or opening the JDK installer, you can perform a silent, non interactive, JDK installation by using command-line arguments.
Beginning to Use the JDK
Use the Java Development Kit in the Windows Start menu to access information related to Reference Documentation.
During JDK install, Java menu items are added to the Windows Start menu to provide easy access to Reference Documentation, which is online documentation web page.
During JDK installation and uninstallation processes, the appropriate start menu items are updated so that they are associated with the latest JDK version on the system
Uninstalling the JDK on Windows
Uninstalling the JDK in Silent Mode
You can use the command line for uninstalling the JDK.
For example, to uninstall JDK 11, run the command:
Windows Installer dialog appears prompting you for confirmation. Click Yes to uninstall JDK.
Finding the JDK Registry Key and UninstallString Value
Under the Uninstall folder, you will find many registry entries within curly brackets.
Highlight Uninstall folder before performing search for a particular registry.
The registry key is highlighted on the right-hand side of the pane and values of various uninstall strings are displayed on the left-hand pane.
JDK Installation Troubleshooting
The following sections provide tips for resolving issues, if any, while installing JDK.
System Error During Decompression
Program Cannot Be Run in DOS Mode
Open the MS-DOS shell or command prompt window.
Right-click the title bar.
Select the Program tab.
Ensure that the item Prevent MS-DOS-based programs from detecting Windows is not selected.
Exit the MS-DOS shell.
Restart your computer.
Characters That Are Not Part of the System Code Page
A 1722 error may occur if the installation directory is not part of the system locale’s code page. To prevent this, ensure that the user and system locales are identical, and that the installation path contains only characters that are part of the system locale’s code page. User and system locales can be set in the Regional Options or Regional Settings control panel.
The associated bug number is 4895647.
Cleanup the Registry After a Failed JDK Uninstall
Sometimes, attempts to uninstall JDK through the Windows Add/Remove program leave behind some Java entries in the registry that are not fully removed. These left behind registry entries can cause problems in installing a new version of Java. The following are the methods to cleanup registry entries:
Program Install and Uninstall troubleshooter (Recommended Method)
Run the Program Install and Uninstall troubleshooter to repair the corrupted registry keys that prevent programs from being completely uninstalled, or blocks new installations and updates.
Manually edit the registry (Use this only if the Fix It utility does not work)
Incorrectly editing your registry may severely damage your system. You should back up any valued data from your computer before making changes to the registry.
Use the File->Export functionality of the registry editor to save the registry key before deleting. In case you deleted the wrong registry key, you can restore the registry from your saved backup file, by using the File->Import functionality.
To delete the registry key:
Как установить JDK и среду разработки IntelliJ IDEA
Начинаем разрабатывать на Java: где взять, как установить и настроить всё, что нужно.
Пройдём через это вместе. Установим JDK в Windows, Ubuntu и macOS, и IntelliJ IDEA тоже в Windows, Ubuntu и macOS. Поехали!
Установка Java Development Kit в Windows
Java Development Kit (JDK) — это комплект ПО для разработчиков приложений на Java. Стандартная установка включает в себя интерпретатор, облегчённый интерпретатор JRE, компилятор, библиотеку Java-классов, отладчик, средства архивации и сжатия jar и другое.
Чтобы установить JDK в Windows, нужно:
Пишет на Java. Верит в Agile. Пьёт много кофе и не любит грязный код.
1. Скачиваем установочный архив
Нам нужна бесплатная версия — AdoptOpenJDK (она есть под Windows, macOS, Ubuntu и другие платформы).
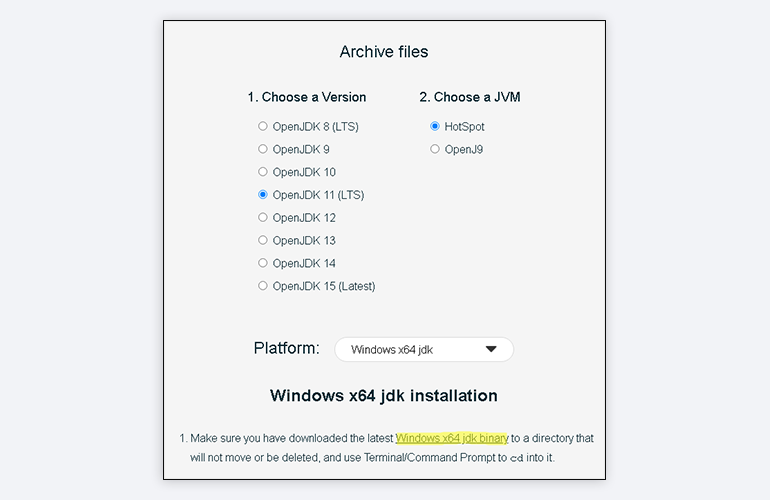
Идём сюда и выбираем версию JDK (актуальны версии 8+), виртуальную Java-машину (JVM) и свою платформу.
Я выбрал OpenJDK 11 ( LTS ), HotSpot и Windows x64 jdk соответственно:
Скачиваем файл по появившейся ссылке (я выделил её жёлтым на скрине выше).
2. Устанавливаем
Извлекаем скачанный архив в папку C:\Program Files\Java\
При этом будет создана подпапка jdk-*номер версии*, а внутри неё появится папка bin.
В результате полный путь до папки bin у меня выглядит так:
3. Настраиваем переменные окружения Windows
Нам нужно создать системную переменную JAVA_HOME, которая будет хранить путь до нашей версии JDK. Это понадобится программам для работы с проектами Java.
Заходим в Панель управления → Система → Дополнительные параметры системы → Дополнительно
А можно и прямо в Панели управления вбить в поиск слово « переменных» (без кавычек). ОС предложит варианты, из которых выбирайте « Изменение системных переменных среды».
У вас откроется окно:
Здесь жмём на кнопку « Переменные сред ы».
В новом окне для раздела « Системные переменные» кликаем « Создать». В « Имя переменной» вводим JAVA_HOME (именно так, латиницей в верхнем регистре), а в поле « Значение переменной» подставляем наш путь C:\Program Files\Java\jdk-*номер версии* :
Далее в разделе « Переменные сред ы…» редактируем системную переменную Path. Нужно добавить в неё путь к папке с исполняемыми файлами Java, а именно: %JAVA_HOME%\bin (соблюдайте регистр символов):
4. Проверяем установку
Запускаем Командную строку Windows. Для этого нажимаем Win + R, а в появившемся окне вводим cmd.exe и жмём на Enter.
Если установка прошла успешно, то ответ покажет версию вашего компилятора:
Установка Java Development Kit в Linux (Ubuntu)
Рассмотрим установку JDK на одном из самых популярных дистрибутивов Linux — Ubuntu 20.04 ( LTS ).
Проще всего установить версию, которая входит в пакет Ubuntu. По умолчанию в Ubuntu 20.04 входит версия Open JDK 11.
1. Проверяем ранее установленные версии
Открываем терминал сочетанием клавиш Ctrl + Alt + T и обновляем базу данных пакетов с помощью APT :
Проверяем ранее установленные версии командой:
Если установка уже выполнялась, то мы увидим что-то такое:
2. Устанавливаем
Для запуска любых приложений Java нужна JRE (Java Runtime Environment — среда выполнения для языка Java). Но для компиляции и разработки программ требуется JDK (Java Development Kit).
Чтобы установить JRE, вводим в консоль:
Для установки JDK — команду:
3. Проверяем установку
Ответ должен выглядеть примерно так:
Установка Java Development Kit в Linux (macOS)
Этот способ установки использует HomeBrew (менеджер недостающих пакетов для macOS).
1. Устанавливаем
Прежде всего нужно добавить репозиторий в HomeBrew. Для этого открываем терминал (Cmd + N) и вводим:
Устанавливаем OpenJDK 11 командой:
2. Проверяем установку
Ответ должен выглядеть примерно так:
Установка среды разработки IntelliJ IDEA Community (Windows)
Intellij IDEA — это интегрированная среда разработки (IDE), то есть система программных средств для создания проектов на разных языках программирования.
Сегодня это самая популярная IDE для языка Java. А ещё есть Eclipse, NetBeans и немало других, но мы рекомендуем именно IDEA, потому что даже её бесплатная версия обладает широкой функциональностью, подходит для профессиональной разработки и вообще делает Java проще в использовании.
В IDE обязательно входят:
1. Какую версию (редакцию) выбрать
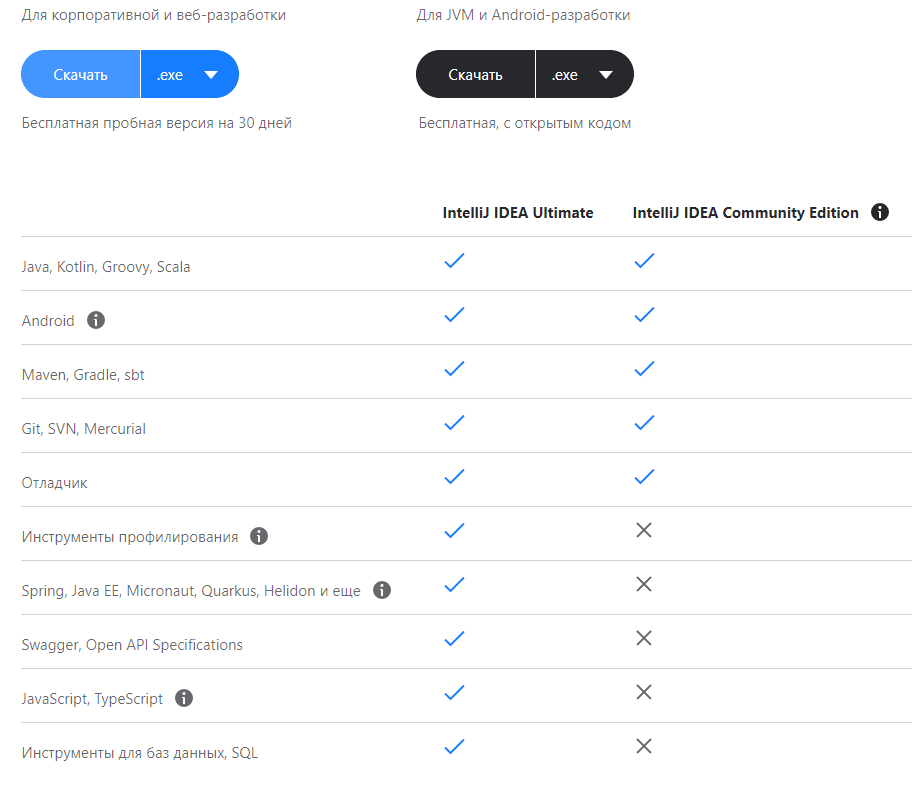
Intellij IDEA доступна в бесплатной (Community) и платной (Ultimate) версиях. Чем они различаются, видно на скрине ниже:
Пока что нам хватит возможностей бесплатной версии.
На заметку: IntelliJ предлагает студентам и преподавателям свободный доступ к своим продуктам.
2. Сама установка
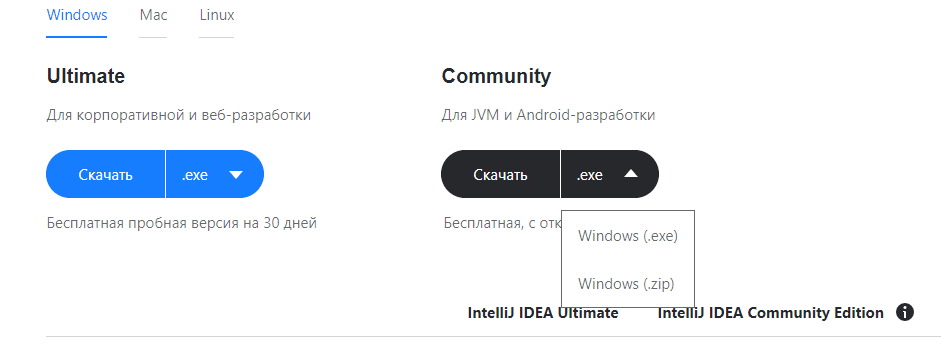
Заходим сюда и качаем версию для Windows.
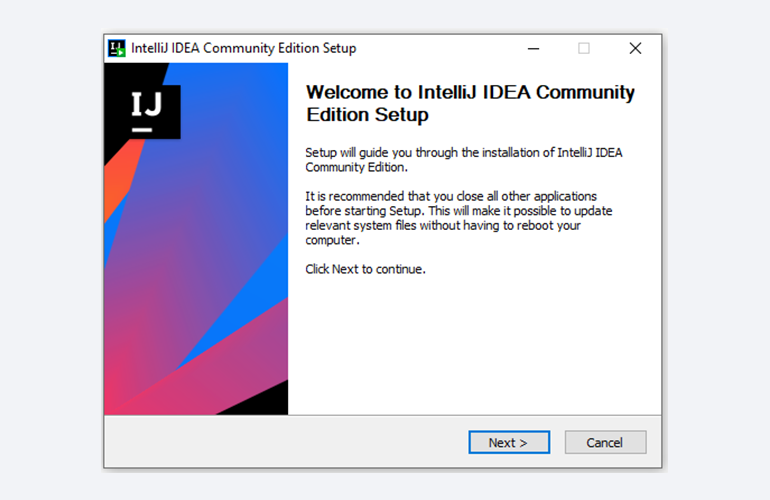
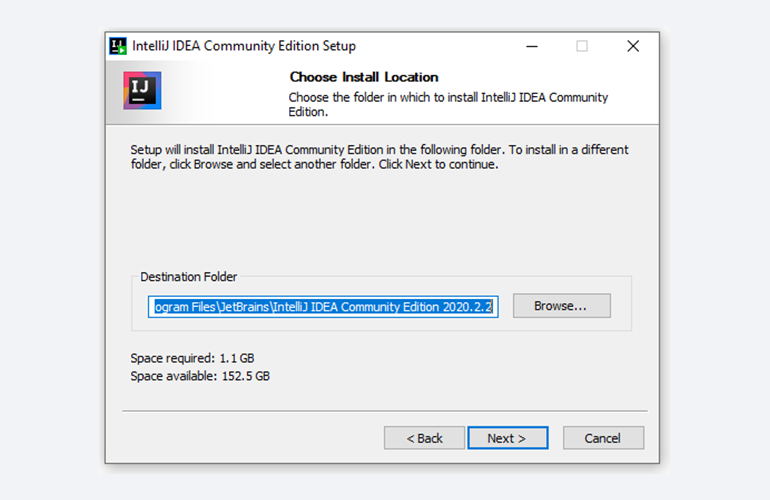
Жмём Next (Далее) и выбираем путь для установки:
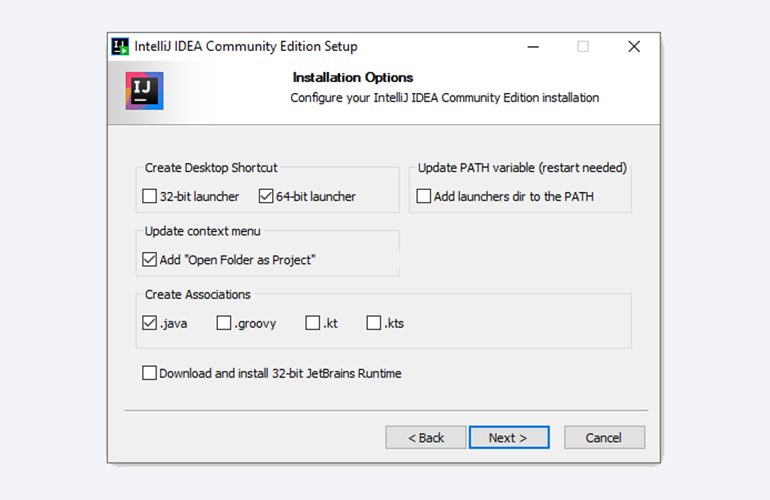
Снова Next, и настраиваем параметры установки:
В общем случае это:
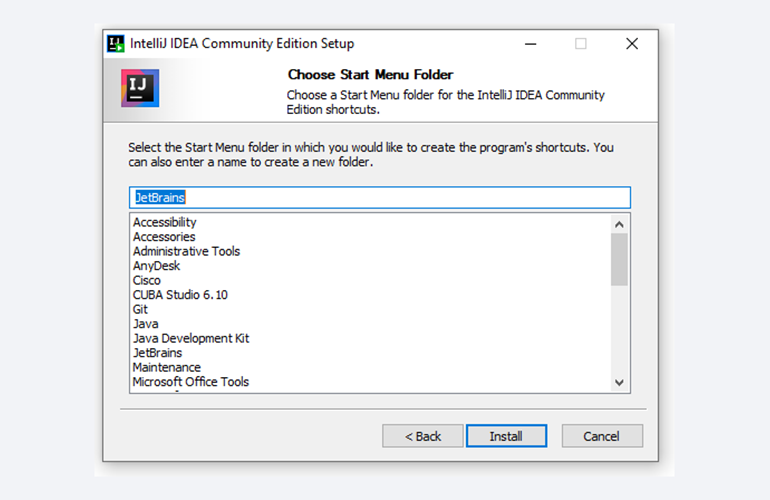
Кликаем Next (Далее) и выбираем папку для ярлыков IDEA (оставляем по умолчанию):
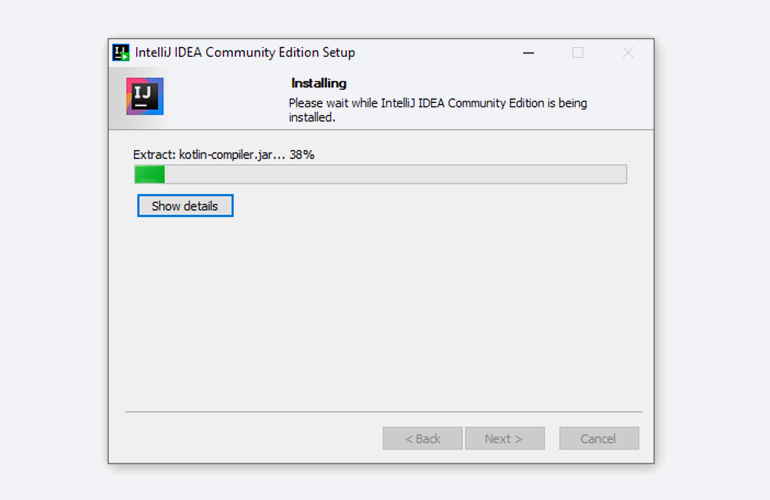
Нажимаем Install (Установить), после чего стартует установка:
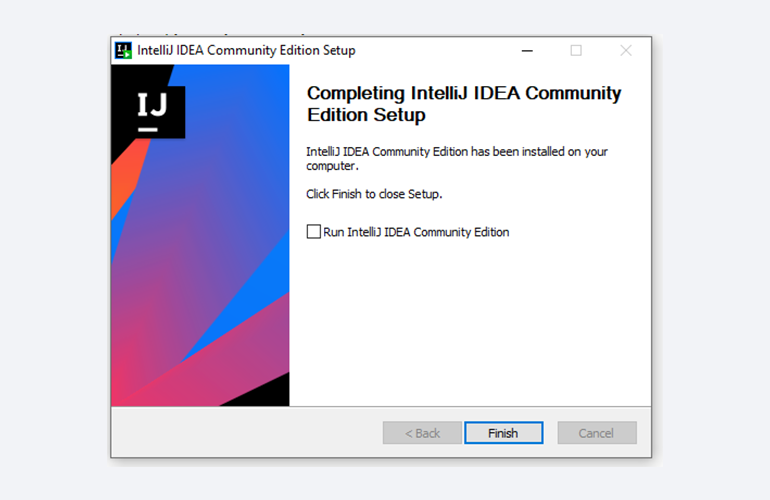
Дожидаемся её окончания и жмём Finish (Завершить):
3. Запуск IntelliJ IDEA и настройка параметров
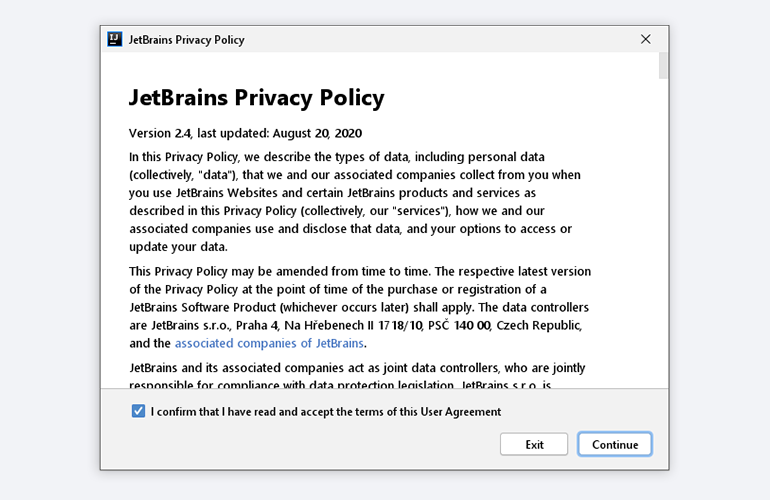
При первом запуске принимаем пользовательское соглашение и нажимаем Continue (Продолжить):
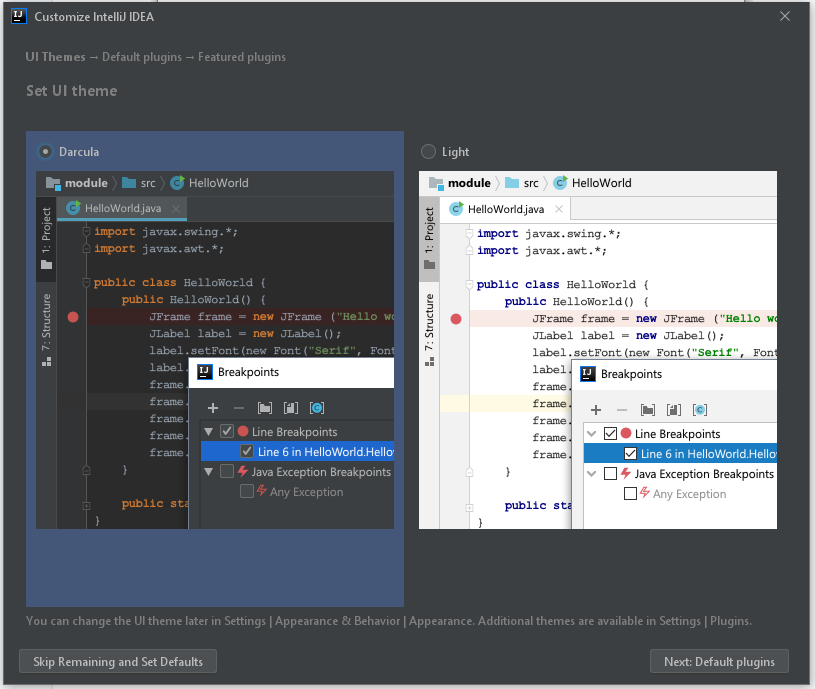
Далее выбираем тему оформления (доступны тёмная и светлая):
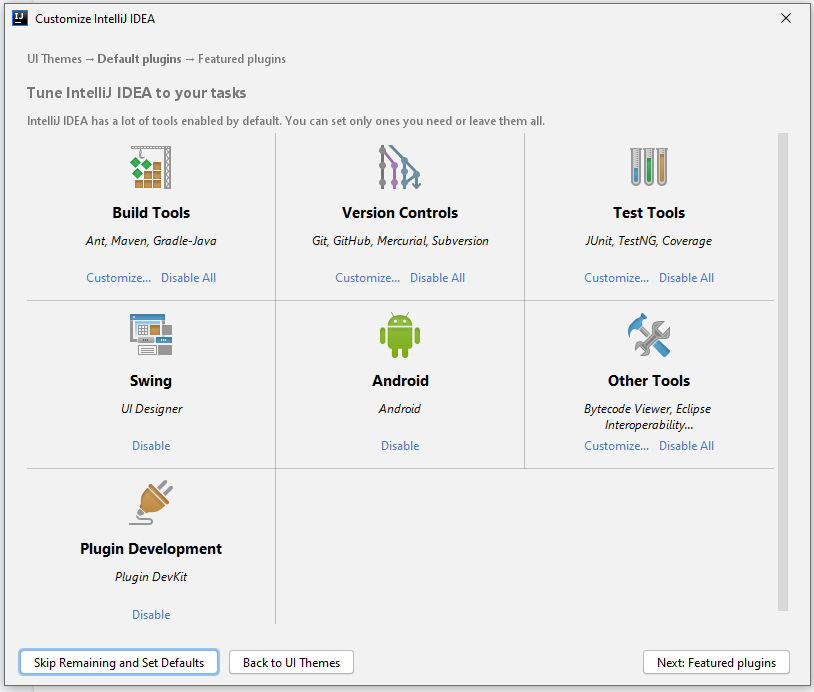
Жмём Next: Default plugins и переходим к выбору устанавливаемых плагинов:
Если не знаете, что вам точно пригодится, — оставляйте всё как есть. А если, например, с Андроидом вам не работать — выключите соответствующий пункт.
Не волнуйтесь, если надобавляете лишнего или о чём-то забудете. Всё можно будет переиграть — в настройках среды.
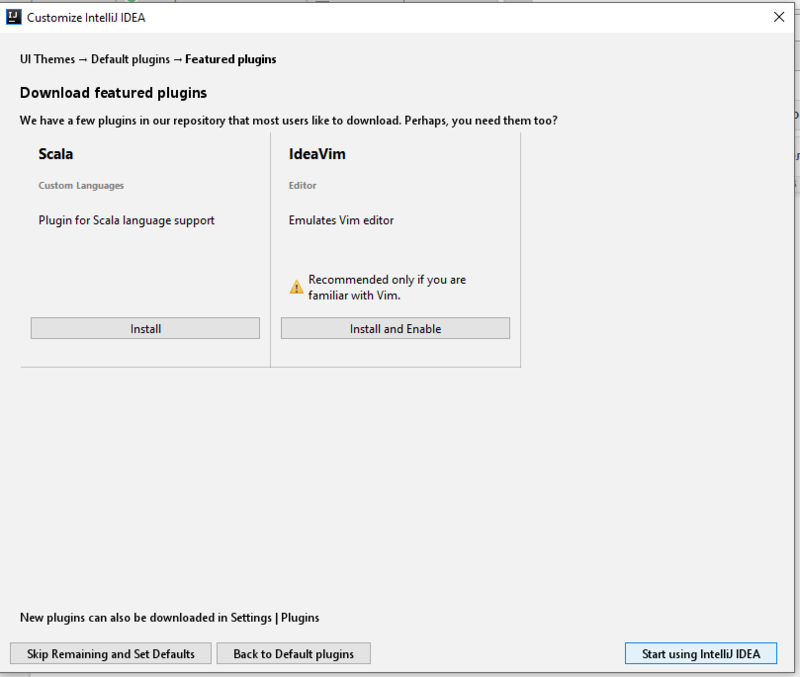
После чего нажмите на кнопку Next: featured plugins и выберите другие нужные плагины (или оставляйте всё по умолчанию):
И наконец, нажимаем Start using Intellij IDEA.
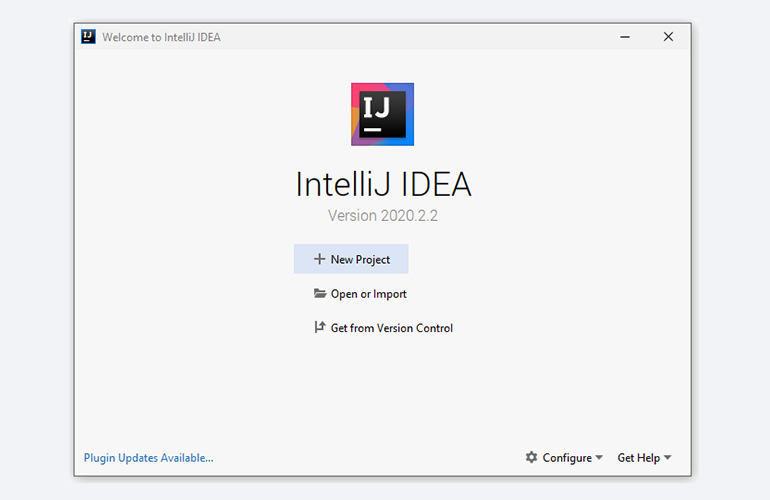
Вас встретит начальный экран среды разработки (Welcome screen). Здесь можно создать новый проект, открыть или импортировать существующий, а также скачать проект из системы контроля версий:
Если вы видите такой же экран — поздравляю, установка и настройка прошли успешно! Приятного обучения!
Установка среды разработки IntelliJ IDEA Community (macOS)
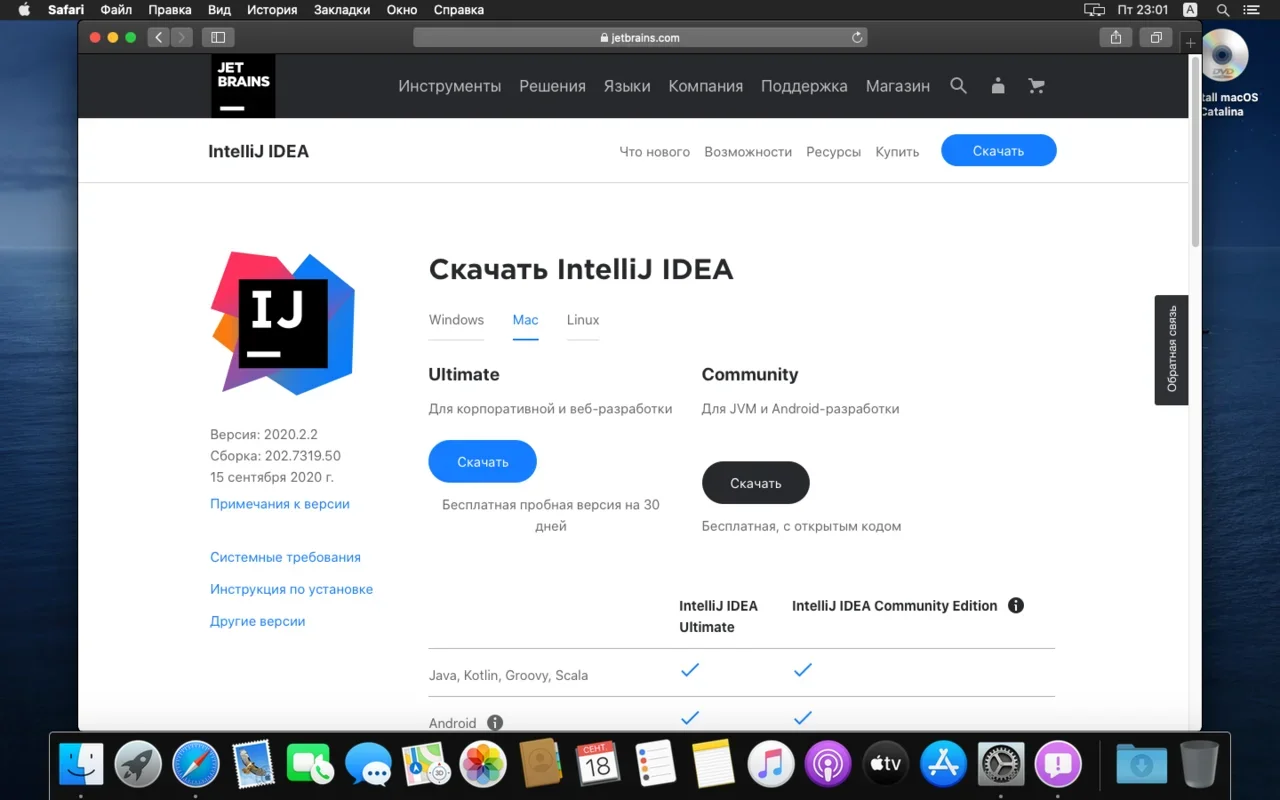
Здесь всё даже легче, чем в Windows. Для начала качаем версию для macOS отсюда (о различии между редакциями Community и Ultimate читайте выше — в пункте про установку на Windows):
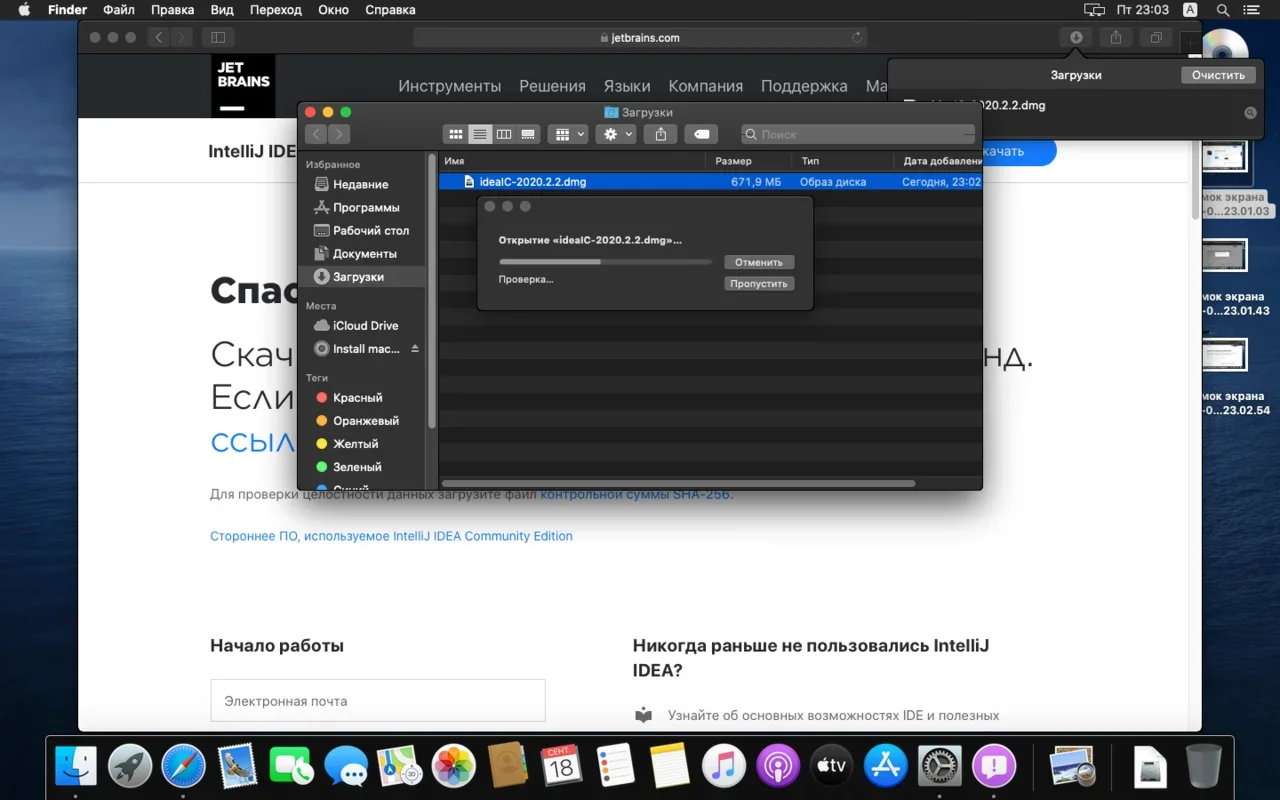
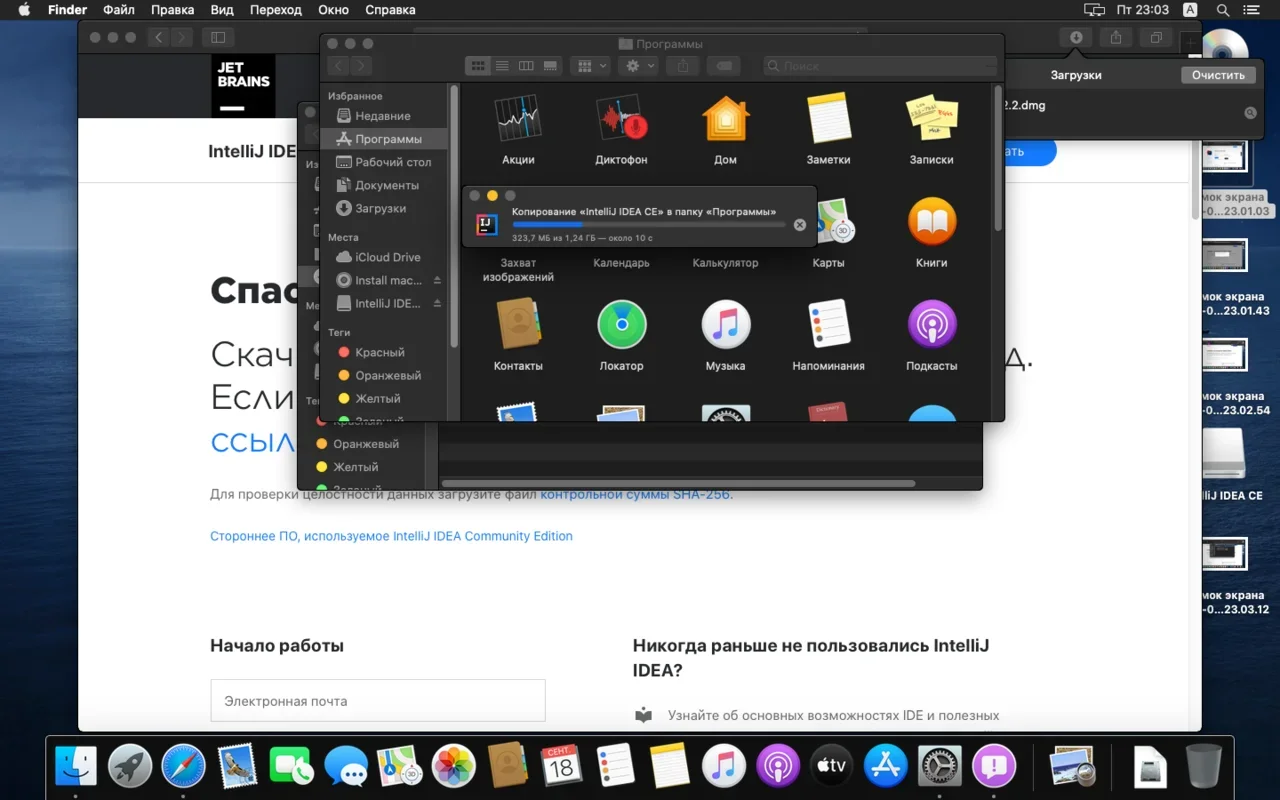
Копируем файл в « Программы»:
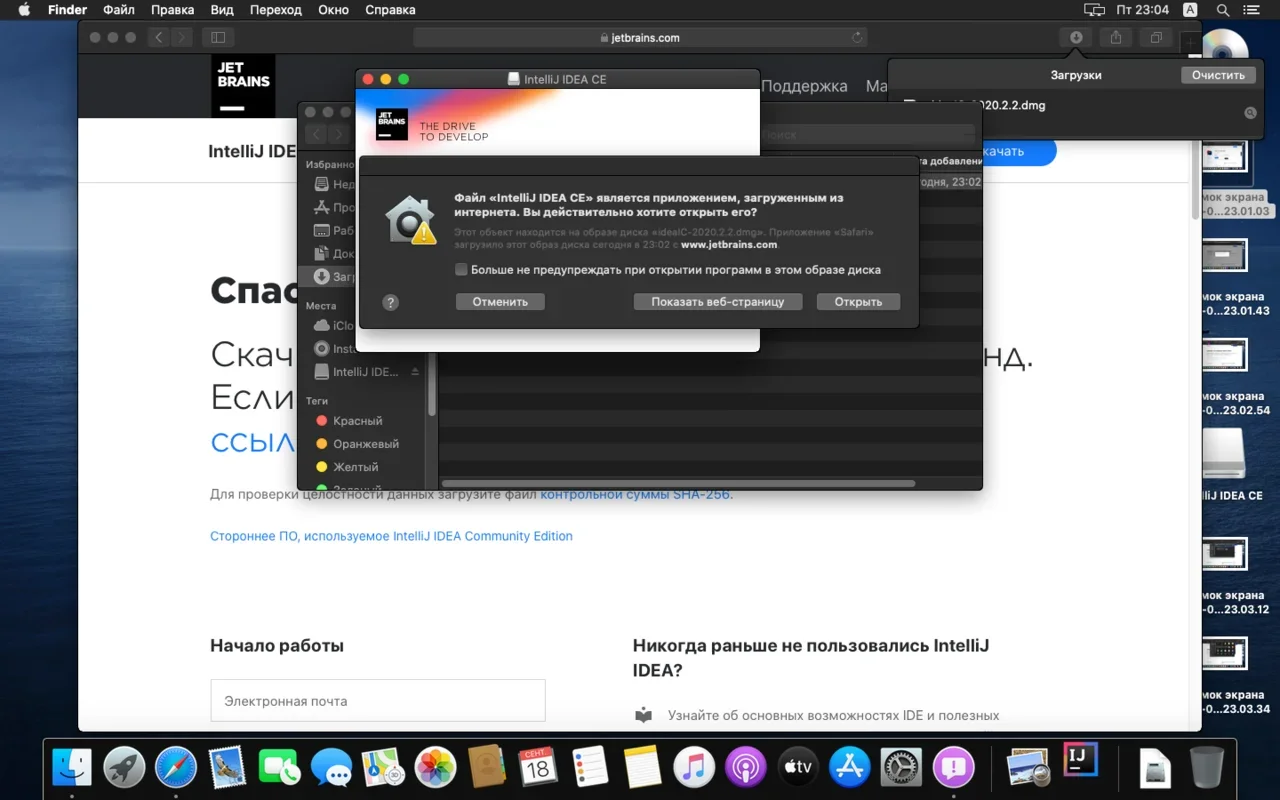
Читаем предупреждение ОС и жмём « Открыть»:
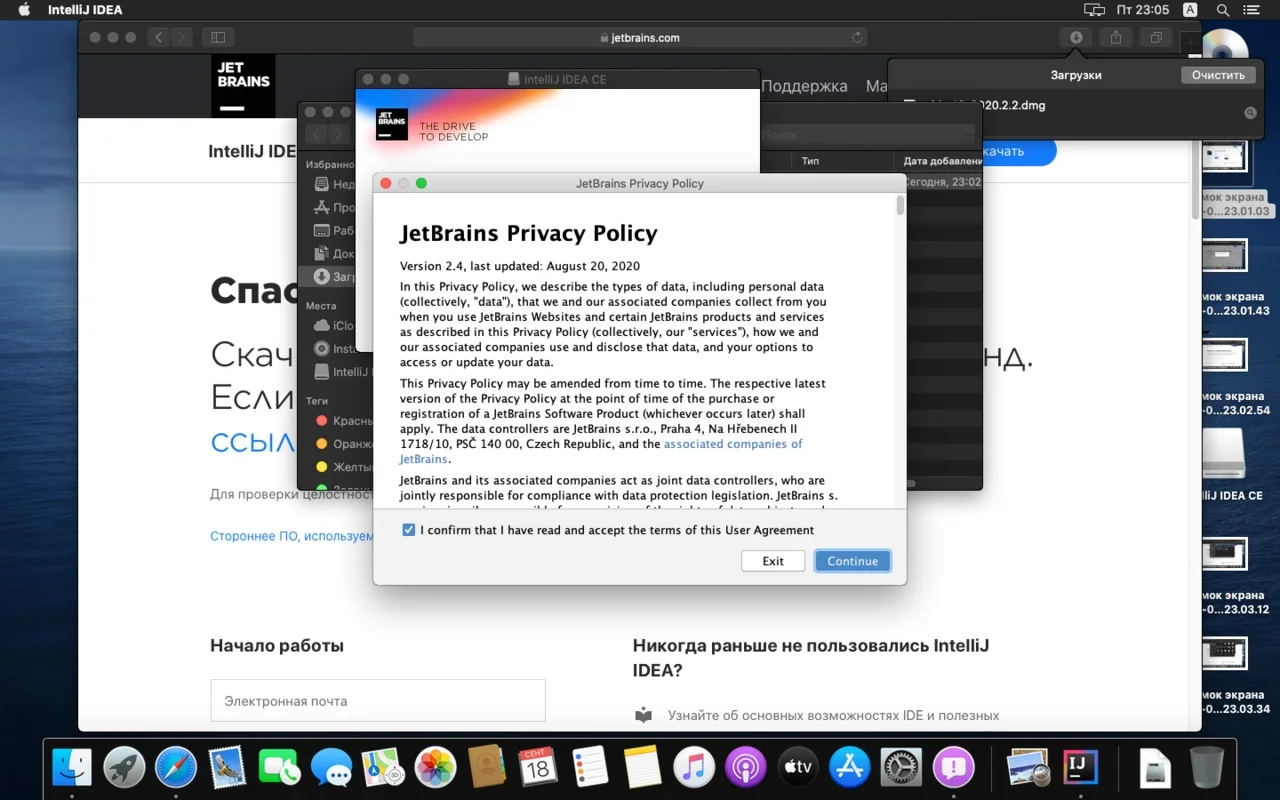
Принимаем пользовательское соглашение и жмём кнопку Continue (Продолжить):
Теперь приложением можно пользоваться. Приятного обучения!
Установка среды разработки IntelliJ IDEA Community (Ubuntu)
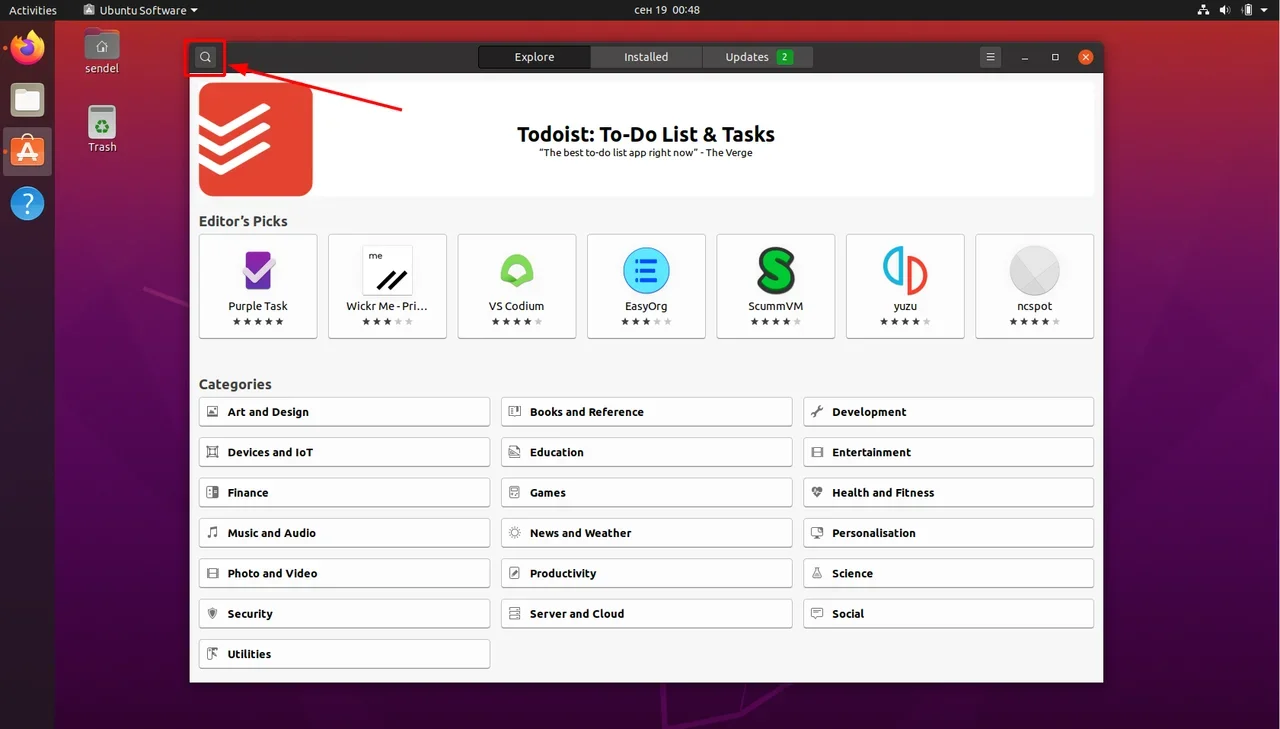
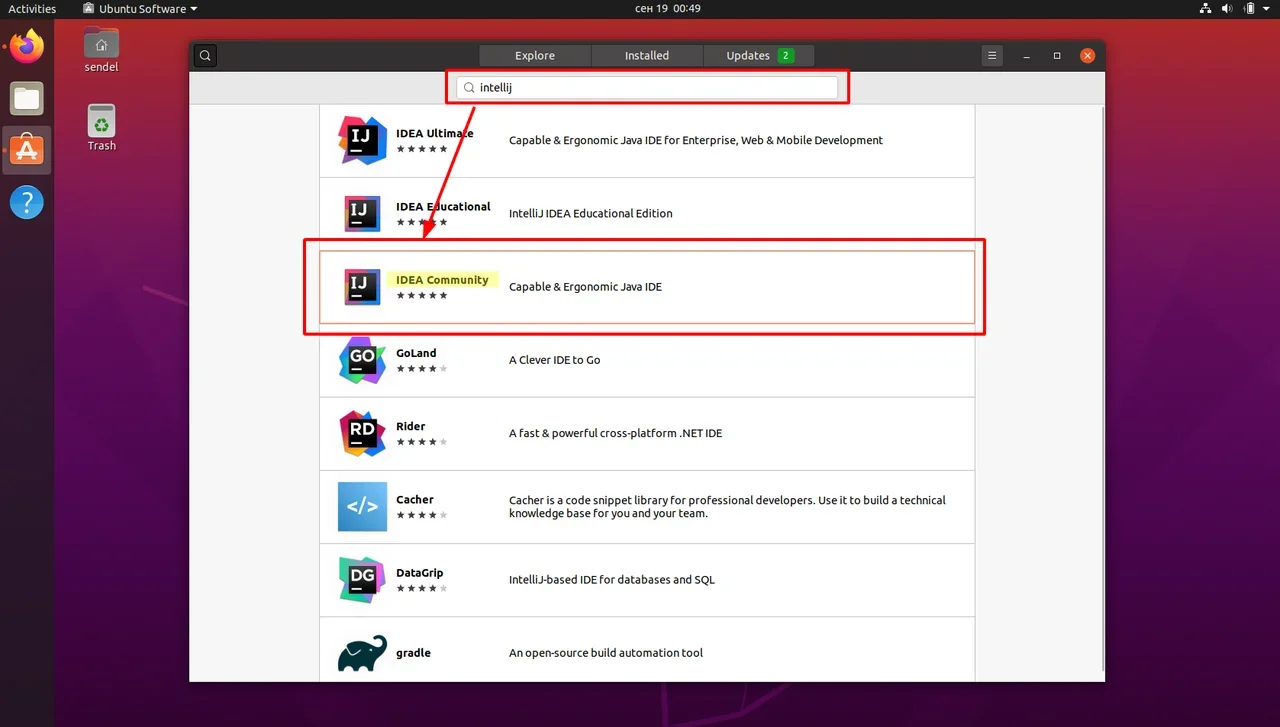
Для установки Intellij IDEA открываем Центр приложений Ubuntu:
Вводим в поиск слово « Intellij» (без кавычек). Нам нужна IDEA Community (о различии между редакциями Community и Ultimate читайте выше — в пункте про установку на Windows):
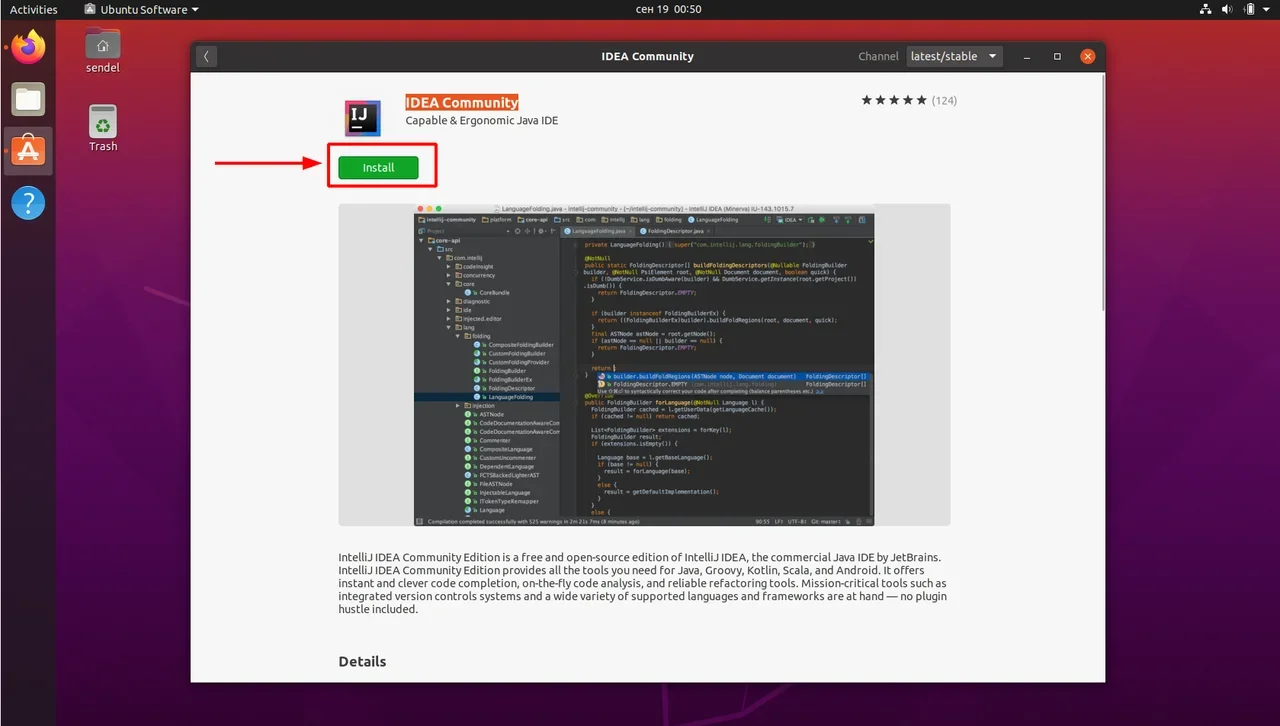
Выбираем версию и нажимаем кнопку Install (Установить):
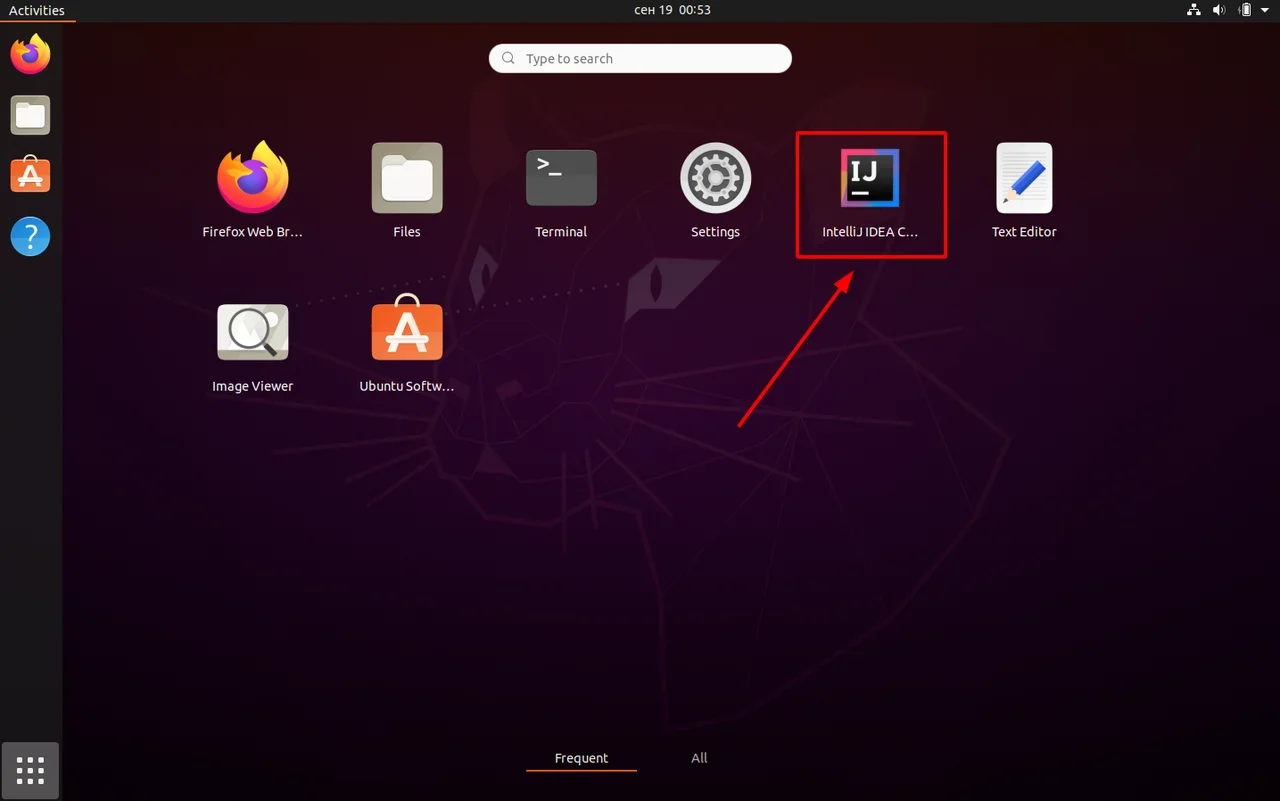
После установки видим IDEA в меню программ:
Запускаем, принимаем пользовательское соглашение и нажимаем кнопку Continue (Продолжить):
