windows build support для unity что такое
Как скачать и установить Unity 5
Скачиваем Unity 5
Одной из популярной программ для создания игр является игровой движок Unity 5. О распространенности и популярности этого движка в данной статье мы рассказывать не будем, перейдем сразу к установке и запуску Unity 5 на Windows 7 х64.
Для начала, перейдем на сайт разработчика и скачаем дистрибутив Unity, вернее так называемый web установщик. На главной странице сайта вам необходимо нажать на кнопку ПОЛУЧИТЕ Unity 5.
Далее вы увидите возможности бесплатной версии Unity и возможности версии Pro. Мы будем использовать бесплатную версию, поэтому нажимаем БЕСПЛАТНАЯ ЗАГРУЗКА. На следующей странице как раз и находится заветная кнопочка ЗАГРУЗИТЬ УСТАНОВЩИК. Так же здесь можно увидеть версию последнего релиза, дату выпуска, размер установщика и выбрать платформу Windows или MacOS.
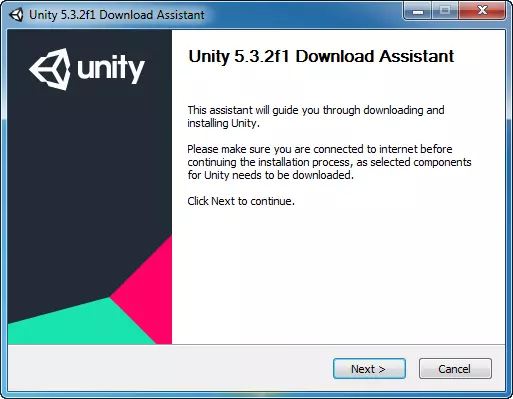
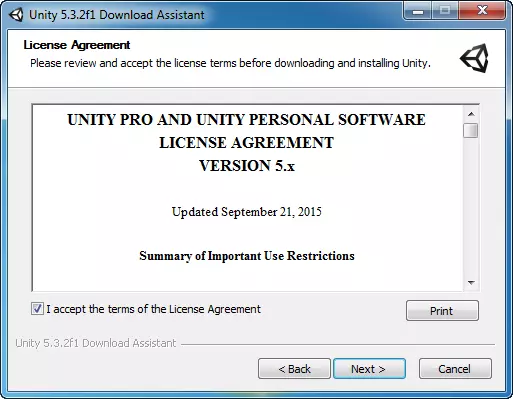
Итак, загружаем и запускаем установщик.
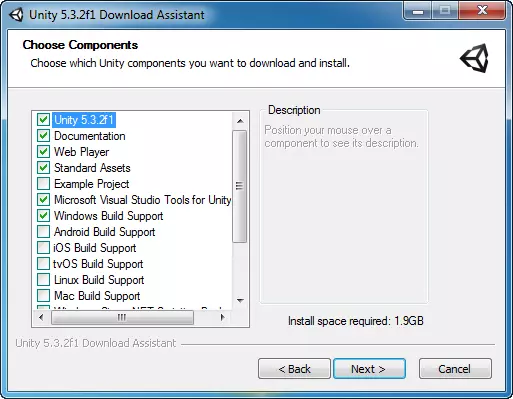
В этом окне веб установщик предлагает выбрать какие пакеты необходимо скачать для удобной работы в Unity. Изначально стоят галочки некоторых пунктах:
Unity 5.3.2 — это собственно сама среда разработки,
Documentation — здесь находятся достаточно подробный материал по работе с Unity,
Web Player — инструмент для создания браузерных приложений и игр, размер не большой, всего 7 мегабайт, оставим, а вообще если вы не собираетесь создавать игры или приложения для браузера это вам не нужно,
Standart Assets — так называемых стандартный ассет, в нем находятся примеры использования скриптов, физических объектов, текстуры, материалы и многое другое,
Microsoft Visual Studio Tools for Unity — в Unity есть встроенный редактор скриптов это Mono Develop, но если вам больше подходит Microsoft Visual Studio можете оставить галочку на этом пункте,
Windows Build Support — служит для компиляции вашего проекта под ОС Windows, собственно если вы собираетесь создавать игры и под другие операционные системы, следует поставить галочку в установщике в соответствующих пунктах.
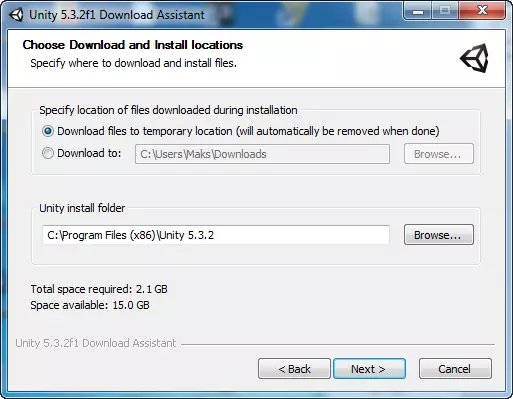
Если определились с выбором компонентов, выбираем место куда установится Unity и ждем пока все это загрузится.
После всех пройденных этапов загрузки и установки, на рабочем столе появится ярлык Unity, установщик можно закрывать.
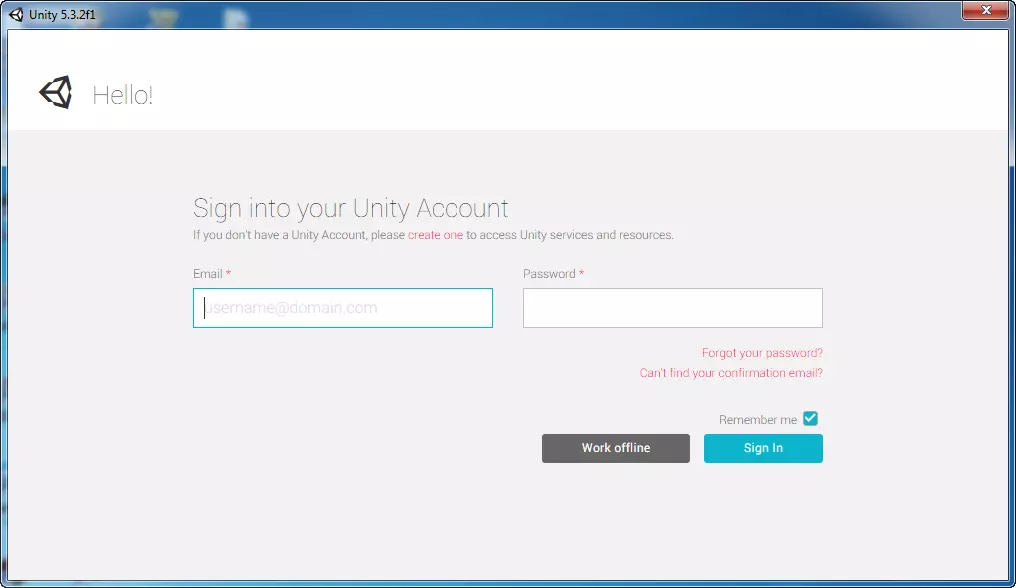
Итак пробуем, первым делом запускается окно с вводом логина и пароля, если у вас есть учетная запись созданная на сайте Unity можете смело вводить свои данные, если нет, можете зарегистрироваться или работать offline, нажав на кнопку work offline.
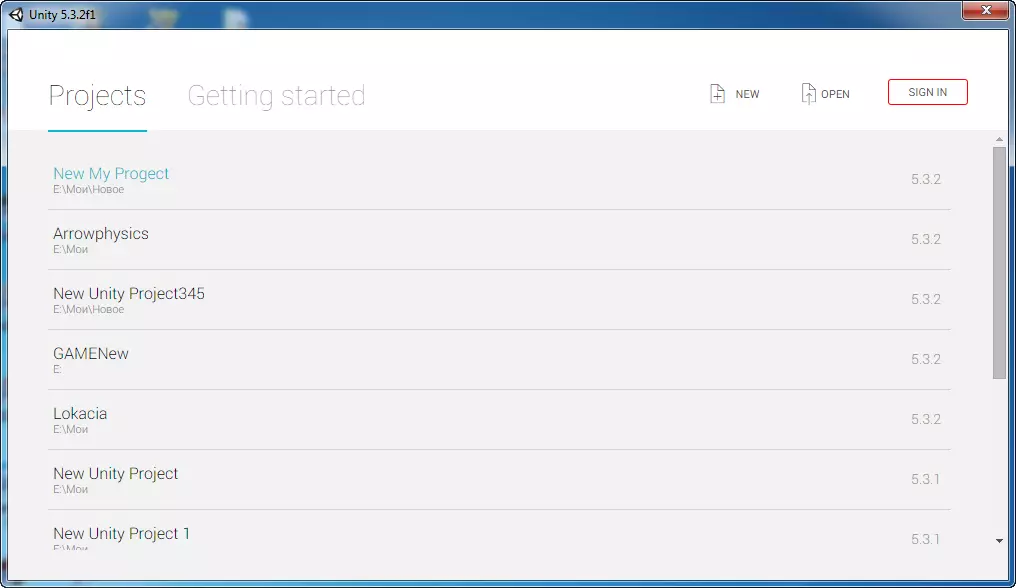
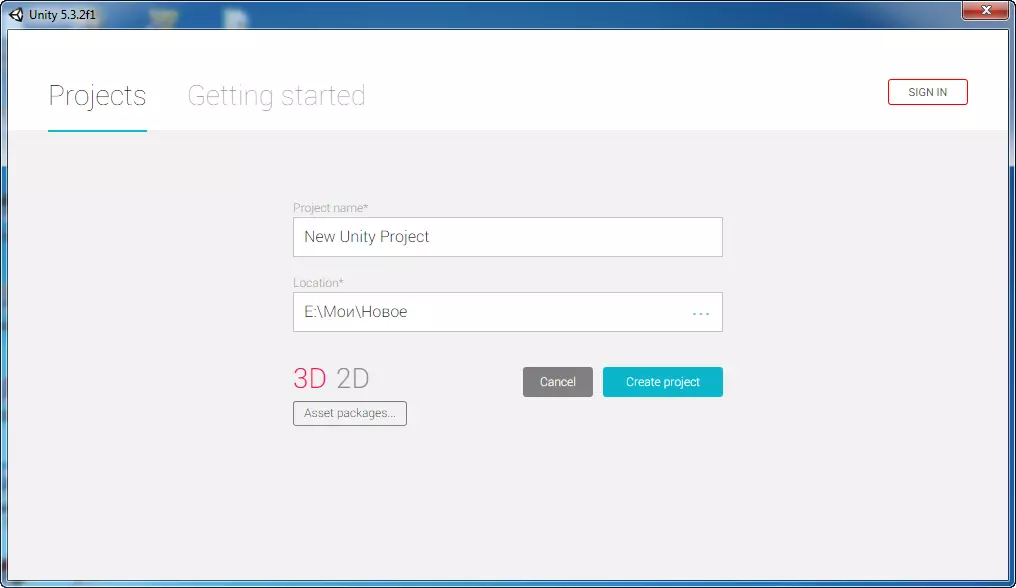
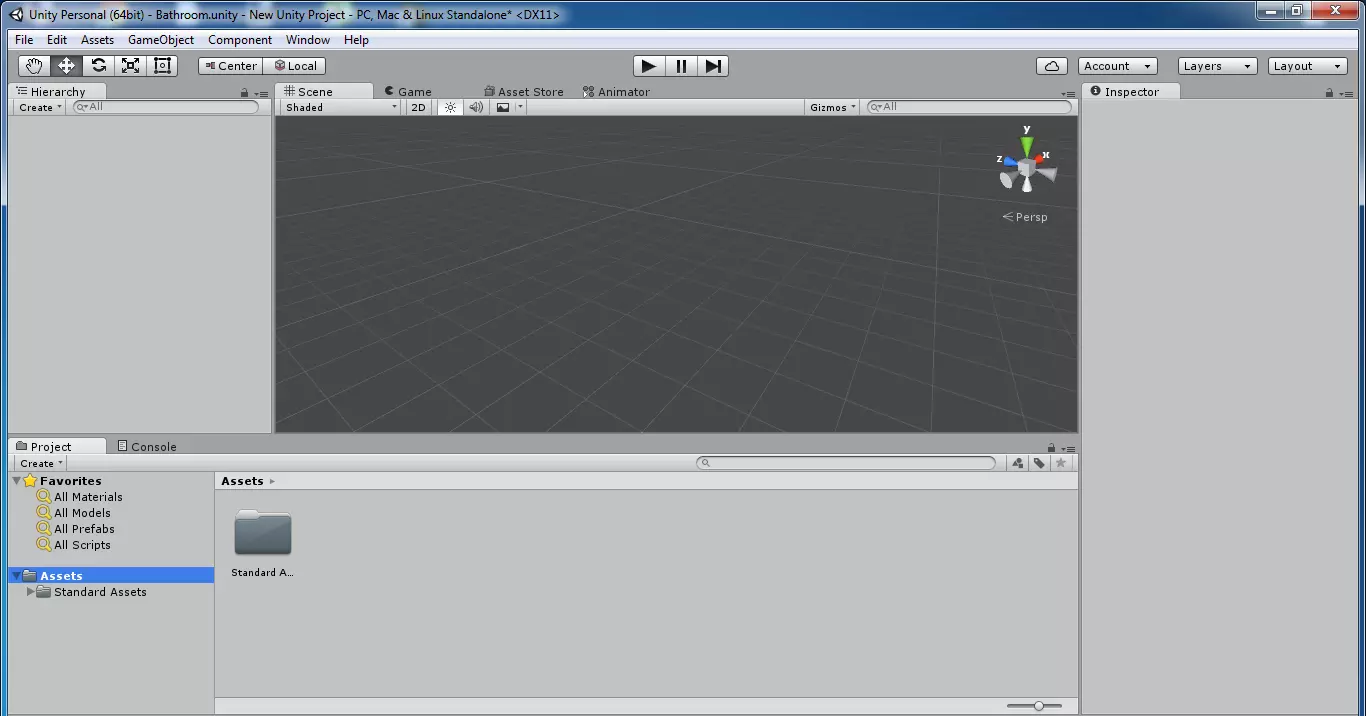
Далее окно выбора проекта, как токовых проектов у вас еще не создано, его необходимо создать, нажав на кнопку NEW. Вводим название проекта и место его расположения, так же выбрать 3D или 2D (по умолчанию стоит 3D) и нажать Create project. Созданный вами новый проект появится в окне Project, для его запуска достаточно нажать на него и у вас запустится Unity.
На этом установка и запуск Unity завершена.
Universal Windows Platform (UWP) build settings
Note: Universal Windows Platform only shows in the Platform list if you’re using Unity on a Windows computer.
Unity doesn’t support Windows Phone development.
Building UWP applications with Unity
The main workflow when building a game or application for UWP using Unity is as follows:
When you click Build in the Build Settings window:
Unity generates and exports a Visual Studio Project.
Open the generated Project’s .sln file in Visual Studio.
Use Visual Studio to build your final application.
When you click Build And Run, Unity builds an app executable that can run independently.
UWP Build Settings
Use these settings to configure how Unity builds your application.
| Setting | Function | |||||||||||||||||||||||||||||||||||||||||||||||||||||||||||||||||||||||||||||||||||||||||||||||||||||||||||||||||||||||||||||
|---|---|---|---|---|---|---|---|---|---|---|---|---|---|---|---|---|---|---|---|---|---|---|---|---|---|---|---|---|---|---|---|---|---|---|---|---|---|---|---|---|---|---|---|---|---|---|---|---|---|---|---|---|---|---|---|---|---|---|---|---|---|---|---|---|---|---|---|---|---|---|---|---|---|---|---|---|---|---|---|---|---|---|---|---|---|---|---|---|---|---|---|---|---|---|---|---|---|---|---|---|---|---|---|---|---|---|---|---|---|---|---|---|---|---|---|---|---|---|---|---|---|---|---|---|---|---|
| Target Device | Choose from the following options to build your app for any device, or select a specific device: Any device, PC, Mobile, or HoloLens. | |||||||||||||||||||||||||||||||||||||||||||||||||||||||||||||||||||||||||||||||||||||||||||||||||||||||||||||||||||||||||||||
| Architecture | Select the type of CPU to build for (only applies to Build And Run). | |||||||||||||||||||||||||||||||||||||||||||||||||||||||||||||||||||||||||||||||||||||||||||||||||||||||||||||||||||||||||||||
| x64 | 64-bit CPU. | |||||||||||||||||||||||||||||||||||||||||||||||||||||||||||||||||||||||||||||||||||||||||||||||||||||||||||||||||||||||||||||
| x86 | 32-bit CPU. | |||||||||||||||||||||||||||||||||||||||||||||||||||||||||||||||||||||||||||||||||||||||||||||||||||||||||||||||||||||||||||||
| ARM | 32-bit ARM CPU. | |||||||||||||||||||||||||||||||||||||||||||||||||||||||||||||||||||||||||||||||||||||||||||||||||||||||||||||||||||||||||||||
| ARM64 | 64-bit ARM CPU. | |||||||||||||||||||||||||||||||||||||||||||||||||||||||||||||||||||||||||||||||||||||||||||||||||||||||||||||||||||||||||||||
| Build Type | Select the type of Visual Studio project or build to generate. | |||||||||||||||||||||||||||||||||||||||||||||||||||||||||||||||||||||||||||||||||||||||||||||||||||||||||||||||||||||||||||||
| XAML Project | Visual Studio project that integrates Unity within a full XAML environment. This results in some performance loss, but lets you use XAML elements in your application. | |||||||||||||||||||||||||||||||||||||||||||||||||||||||||||||||||||||||||||||||||||||||||||||||||||||||||||||||||||||||||||||
| D3D Project | Visual Studio project that integrates Unity in a basic app window. This results in the best performance. | |||||||||||||||||||||||||||||||||||||||||||||||||||||||||||||||||||||||||||||||||||||||||||||||||||||||||||||||||||||||||||||
| Executable Only | Hosts the project in a pre-built executable for rapid iteration. This setting has the quickest iteration speed because it doesn’t require you to build the generated project in Visual Studio. It offers the same performance as D3D Project builds. | |||||||||||||||||||||||||||||||||||||||||||||||||||||||||||||||||||||||||||||||||||||||||||||||||||||||||||||||||||||||||||||
| Target SDK Version | The Windows 10 SDK installed on the local PC to build the application against. This setting is only relevant when calling Windows 10 APIs directly from scripts. Note: Unity requires the base Windows 10 SDK version 10.0.10240.0 or higher for building UWP apps, and doesn’t support Windows 8/8.1 SDKs. | |||||||||||||||||||||||||||||||||||||||||||||||||||||||||||||||||||||||||||||||||||||||||||||||||||||||||||||||||||||||||||||
| Minimum Platform Version | Minimum Windows 10 release version required to run the app. Note: This setting is only relevant if you’re using Windows features or APIs that aren’t available in the base Windows 10 version (10.0.10240). | |||||||||||||||||||||||||||||||||||||||||||||||||||||||||||||||||||||||||||||||||||||||||||||||||||||||||||||||||||||||||||||
| Visual Studio Version | Target a specific Visual Studio release if you have multiple versions installed. | |||||||||||||||||||||||||||||||||||||||||||||||||||||||||||||||||||||||||||||||||||||||||||||||||||||||||||||||||||||||||||||
| Build and Run on | Select the target device or transport to deploy and launch the app during Build And Run. | |||||||||||||||||||||||||||||||||||||||||||||||||||||||||||||||||||||||||||||||||||||||||||||||||||||||||||||||||||||||||||||
| Local Machine | Deploys and launches the app on the local PC. | |||||||||||||||||||||||||||||||||||||||||||||||||||||||||||||||||||||||||||||||||||||||||||||||||||||||||||||||||||||||||||||
| USB Device | Deploys and launches the app on a remote device over a USB connection. | |||||||||||||||||||||||||||||||||||||||||||||||||||||||||||||||||||||||||||||||||||||||||||||||||||||||||||||||||||||||||||||
| Remote Device (via Device Portal) | Deploys and launches the app to a connected device over the Device Portal transport. To deploy over the Device Portal, you must enter the connection and authentication information in these additional fields: — Device Portal Address (required) For more information, see documentation on Windows Device Portal deployment. | |||||||||||||||||||||||||||||||||||||||||||||||||||||||||||||||||||||||||||||||||||||||||||||||||||||||||||||||||||||||||||||
| Build Configuration | Select the build type (only applies to Build And Run). Note: These build configurations are the same as those available in the Visual Studio project that Unity generates. | |||||||||||||||||||||||||||||||||||||||||||||||||||||||||||||||||||||||||||||||||||||||||||||||||||||||||||||||||||||||||||||
| Debug | Produces a build that contains additional code you can use for debugging, and enables the Profiler A window that helps you to optimize your game. It shows how much time is spent in the various areas of your game. For example, it can report the percentage of time spent rendering, animating, or in your game logic. More info See in Glossary for your build. | |||||||||||||||||||||||||||||||||||||||||||||||||||||||||||||||||||||||||||||||||||||||||||||||||||||||||||||||||||||||||||||
| Release | Produces a build that has debug code stripped out, and enables the Profiler for your build. | |||||||||||||||||||||||||||||||||||||||||||||||||||||||||||||||||||||||||||||||||||||||||||||||||||||||||||||||||||||||||||||
| Master | Produces a build that is fully optimized for release. | |||||||||||||||||||||||||||||||||||||||||||||||||||||||||||||||||||||||||||||||||||||||||||||||||||||||||||||||||||||||||||||
| Copy References | Disable this setting to allow the generated solution to reference Unity files from Unity’s installation folder instead of copying them to the build folder. This can save up to 10 GB of disk space, but you can’t copy the build folder to another PC. Unity also builds your application faster when you disable this setting. | |||||||||||||||||||||||||||||||||||||||||||||||||||||||||||||||||||||||||||||||||||||||||||||||||||||||||||||||||||||||||||||
| Copy PDB files | Enable this setting to include Microsoft program database (PDB) files in the built Standalone Player. PDB files contain debugging information for your application, but might increase the size of your Player. For more information, see documentation on Windows debugging. | |||||||||||||||||||||||||||||||||||||||||||||||||||||||||||||||||||||||||||||||||||||||||||||||||||||||||||||||||||||||||||||
| Development Build A development build includes debug symbols and enables the Profiler. More info See in Glossary | A development build includes scripting debug symbols. When you select the Development Build setting, you can also select the Autoconnect Profiler, Script Debugging, and Scripts Only Build setting. It also enables the DEVELOPMENT_BUILD #define. Once enabled, Unity only rebuilds the scripts in your application, and leaves data files from a previously executed build intact. It significantly improves iteration times if you only change the code in your application. Unity universal windows platform build support что этоUniversal Windows Platform (UWP) build settingsNote: Universal Windows Platform only shows in the Platform list if you’re using Unity on a Windows computer. Unity doesn’t support Windows Phone development. Building UWP applications with UnityThe main workflow when building a game or application for UWP using Unity is as follows: When you click Build in the Build Settings window: Unity generates and exports a Visual Studio Project. Open the generated Project’s .sln file in Visual Studio. Use Visual Studio to build your final application. When you click Build And Run, Unity builds an app executable that can run independently. UWP Build SettingsUse these settings to configure how Unity builds your application.
| |||||||||||||||||||||||||||||||||||||||||||||||||||||||||||||||||||||||||||||||||||||||||||||||||||||||||||||||||||||||||||||
 У Microsoft была мечта о Windows 8, которая включала бы универсальные приложения Windows, распространяющиеся на телефоны, планшеты, ПК и даже консоли Xbox. План состоял в том, чтобы разработчики могли написать одно приложение для всех этих устройств, и оно волшебным образом работало бы везде. Эта мечта начала разваливаться после провала Windows Phone, с тех пор прошлом много времени, и похоже, что теперь все закончено.